
I forgot I promised these before Oct. 31st and I guess it still is before that date. I am not sure anyone will jump at the idea of making them now with the big day so close at hand, but maybe a great girl Christmas gift. Pre-make the wings and some decorating supplies and it becomes a great girl craft project.
I know you can buy fairy wings pretty cheap these days especially after Halloween. But sometimes fairy wings that you make can be more fun. Why??
1. You can decorate them anyway you want to. So that in itself becomes an awesome project for any fairy lover. Fabric markers, Glitter glue, Gems, you name it. Decorating wings is a great girl project.
2. Sometimes you need wings when you can't find them. Sure they are easy to find around Halloween but what about other times?
3. When you make them yourself you can make whatever shape or size you want or need.
What you need:

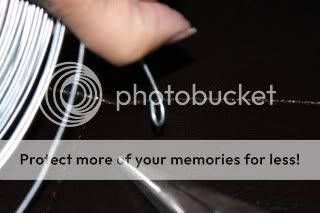
5 or 7 Gage Wire I get mine at Ace Hardware store. I believe that this spool is 7 gage, but it could be 5 gage. I got it so long ago I don't remember. Go with something that is easy to bend, yet not too easy that if a fairy falls that they won't get bent out of shape.

Two Containers of Knee High panty hose. We found a great price at Walmart around 4 for $1 and they come in a tiny plastic container that works great for this other project so hang on to the plastic container!! We used white.
Elastic About any strip elastic will do. I think ours was round half inch in width.
First use a needle nose pliers and make a small bend in the end of the wire. Do not close the loop yet.
Bend your first fairy wing shape and then hook your bend around the wire where you want them to connect. We made our wings the shape of candy corn to go with this costume. Then close the loop of the wire around the other wire.

Repeat for the second wing and then trim the wire so you can make a loop at the other end. This loop I hook inside the other loop so that the wing set stays in place.
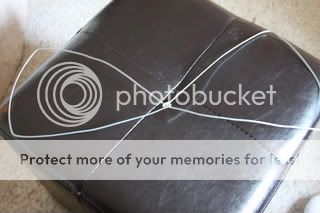

Repeat these steps so you have a set of two wings.

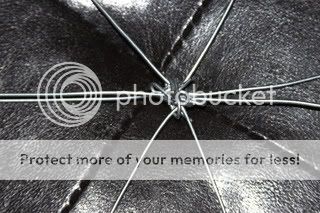
Then you need to connect the two sets. Do this by wrapping wire around the two sets to make them secure. You don't have to worry about how this looks, it will be covered by the tights, but try to make sure all your sharp ends are tucked in so that they do not snag your nylons.
Next take your nylons and put one on each wing.

Choose one side of your wings to be the back. Pull the extra nylon tight and twist into a long piece and tie off with a knot. If you have enough extra you can wrap it around the front and back to the back side and tie to another piece of nylon. Do not cut extra lengh off yet.
Make your arm loops by ting two circles of elastic. I attached mine by putting tying some extra lenghts together on the backside of the wings with this looped elastic under the knot.


No comments:
Post a Comment